

How Can We Help?
Create and manage an auto responder (IVR)
| An automatic responder (IVR, Interactive Voice Responder) is a tool used to immediately answer incoming calls with pre-recorded messages and / or allow the caller to direct the call to an extension or group based on a choice (input) entered from the telephone keypad. It is therefore very useful for automatically sorting calls without any human filter. |
HOW TO CREATE AN AUTOMATIC RESPONDER WITH THE VOISPEED SWITCHBOARD
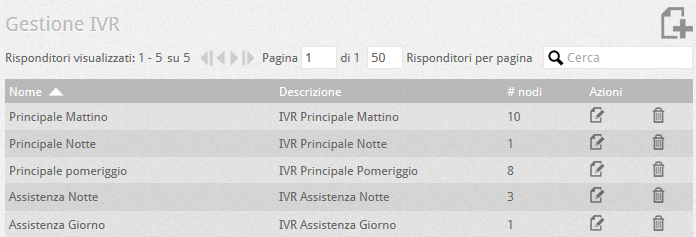
| The first operation to be performed is to add a new responder: Configuration – Responders. When creating the responder, a particularly important parameter is the one that allows you to select a user (FAX type) to which to divert the call if in its negotiation the carrier indicates it with codec T.38; in practice, this configuration allows you to configure the particular telephone lines at the automatic responder level that can manage both voice and FAX calls for the company. When in this situation and the telephone operator or the gateway used to manage the line negotiate the T.38 codec for FAX calls, the VOIspeed switchboard is able to recognize the negotiation and manage the call by deciding not to proceed. in the tree navigation but direct the communication to the FAX user configured at this level.To find out how to configure users as FAX, see. Creating and configuring PBX users |
 |
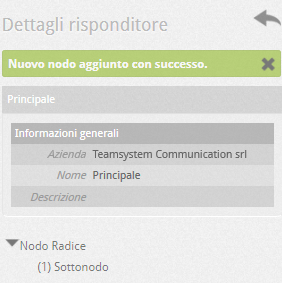
| Once the responder has been created (which represents the container of the actual structure), it is necessary to add the root node, and subsequently, if necessary, its sub-nodes. Click on the button  of the desired existing responder and create the first root node (button of the desired existing responder and create the first root node (button  or click on the link “Create the responder root node”). or click on the link “Create the responder root node”). |
 |
| Note: Only one root node can be created for each responder. | |
| Details Blank Responder | 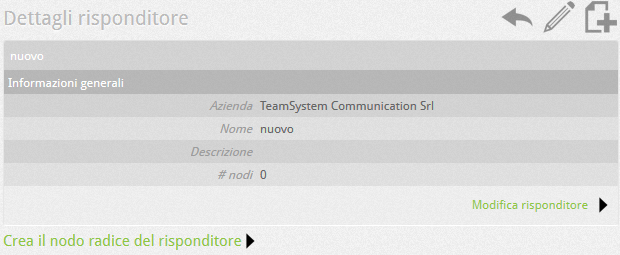 |
| Configuration parameters of the Create node | 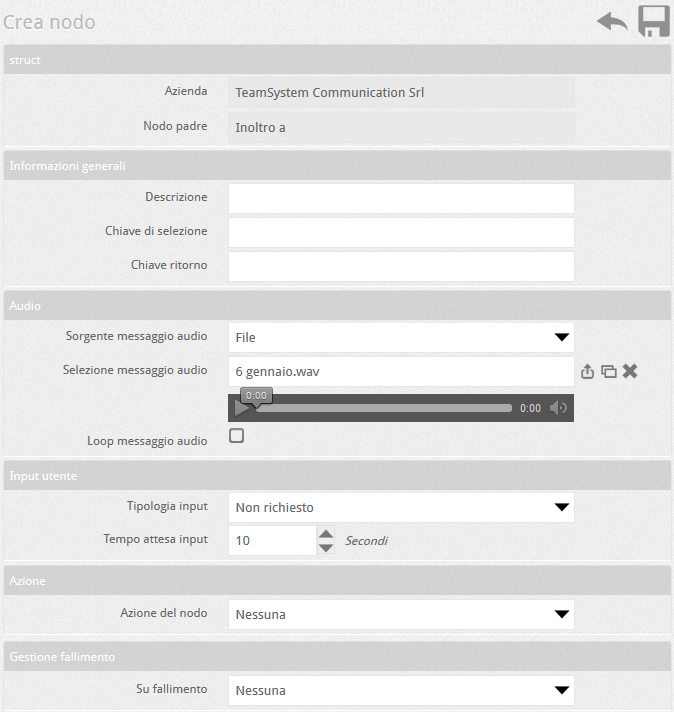 |
NODE PARAMETERS
| Parameter | Description |
| Parent Node | “Parent” node of the current node (present only if the current node is a sub-node) |
| Company | Company that owns the node |
| Description | Description Convenient description of the node |
| Audio Msg Source | None: no audio file will be played upon entering the node File: An audio file will be played |
| Loop Msg audio | Plays the message continuously or not. This option, if activated, bypasses the event on failure which will never be activated even in the event of an incorrect selection |
| Audio Msg Selection | If the audio source is set to File, it allows you to choose the file from the company folder (already specified by the super administrator). The file can be selected with the button  or uploaded with the button or uploaded with the button  . After selecting the file, you will be able to listen to it with the integrated player that will appear under the file name. . After selecting the file, you will be able to listen to it with the integrated player that will appear under the file name. |
| Input Type | Indicates how the user tone inputs will be managed:
|
| Input Waiting Time | Indicates the waiting time within which the user must type the tones, otherwise it generates a failure event. The count begins at the node entry or, if there is a message, after the message itself has been played. |
| Node action | Indicates the action performed by the node once the interlocutor has entered it (see table below) |
| On failure | Indicates where to transfer the call following the failure of user input (User, Group, Other IVR). By failure, we mean a timeout while waiting for the same, while an input error causes the node message to be repeated. |
ACTIONS OF THE NODE
| None | The node closes the call: if there is a message to play, the call will be closed at the end. |
| Go to the next node | Use the user input as the sub-node selection key. |
| Transfer to a user | As soon as the playback of the audio message (if present) has finished, the IVR forwards the call to the user chosen from among the PBX users. |
| Transfer to Group | Same as above, but the call is transferred to a PBX user group to be selected from the list below |
| Transfer to Another IVR | Same as above, but the call is forwarded to another PBX responder |
| Transfer to Voicemail | Same as above, but the call is forwarded to the selected corporate voicemail |
| Transfer to WAN Gateway | Same as above, but the call is transferred to a WAN route via a number or string (specified in the field below). In order for the transfer to be completed, it is FUNDAMENTAL that in the PBX beyond the WAN route the chosen number is indicated among the company numbers and is correctly routed to an entity (IVR, group, user, etc.). |
| Transfer to number | Same as above, but the call is forwarded to another number (which can be for example an external number). The call will be routed according to the rules of the LCR. |
| Transfer to user input | Transfers the call to the number entered by the interlocutor (dynamic forwarding). It can be used for example to call extensions directly |
| Execute external script | executes an external script to dynamically route the call based on the parameters evaluated by the responder (see point below – INTEGRATION) |
ADD UNDER-KNOTS TO ROOT KNOT
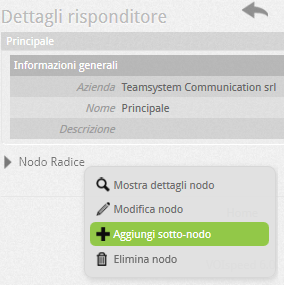
If the root node provides choices that forward to other sub-nodes (such as in multiple choices such as: press 1 for the sales office, 2 for the technical office, …) it is possible to add sub-nodes by clicking on the name of the root node (the same operation can also be done for each sub-node): a contextual menu will appear that will allow you to add a sub-node to the selected node (obviously you can also delete or modify the selected node).
The sub-nodes have the same properties as the root node (see above). However, since the sub-nodes are not directly reachable from the outside, they need a “selection key” to be reached. From the sub-node it is also possible to return to the upper level (node from which the call came) and for this operation the “return key” is used.
Selection key: it is the number that, if typed inside a parent node, allows you to enter the sub-node.
Return key: corresponds to the combination of tones to be dialed to return to the previous node. So for example, if the caller has accidentally entered a sub-node, he can dial the combination indicated to return to the higher-level node. Obviously, the audio message must communicate what this combination is.
To associate the responder with a corporate number, you need to create a routing rule using the wizard.