Manuali VOIspeed®
How to create a new item in the VOIspeed address book
In this article we will see how you can add a new contact or a new company within the VOIspeed address book After entering the Address Book TAB, simply select the key at the top right . In this way a contextual menu will appear that will allow you to choose whether to add a new contact or a new company.
 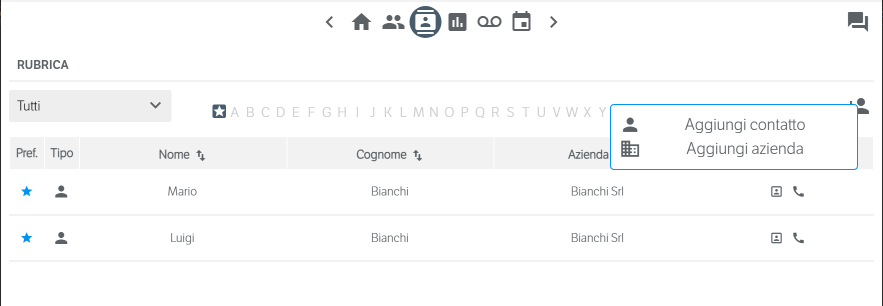 Let’s see below how to manage the two possibilities in question.
Let’s see below how to manage the two possibilities in question.
ADD CONTACT
The entry form for a new contact allows you to enter various information relating to it, divided by sections. Let’s see them in detail:

- PERSONAL INFORMATION: here you can enter Name, Surname, E-mail and, above all, the Company to which the contact belongs. Entering the company entails the possibility of choosing from the companies already present in the VOIspeed PBX system (created by the administrator or other users) or to add a new one if necessary (see next paragraph ADD COMPANY);
- Visible to all: if flagged, the contact in question will be visible to all other users of the company. On the contrary, it will only be visible to the creator user;
- Modifiable by all: if flagged, the contact can be modified by all users otherwise. On the contrary, it will only be editable by the creator;
- Favorite: a favorite contact is the first to be displayed at the address book entry.
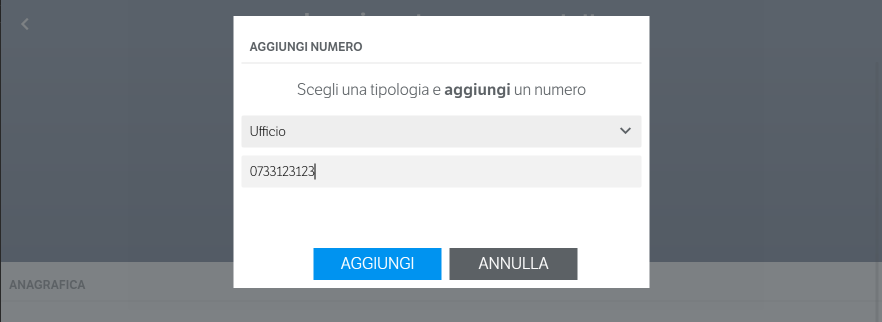
- NUMBERS: in this section it is possible to add a number. For each new number, you can choose a type using the appropriate dialog box that opens by selecting the ADD NUMBER item
ADD COMPANY
The form for inserting a new company allows you to insert various information relating to it, divided by sections. Let’s see these aspects in detail: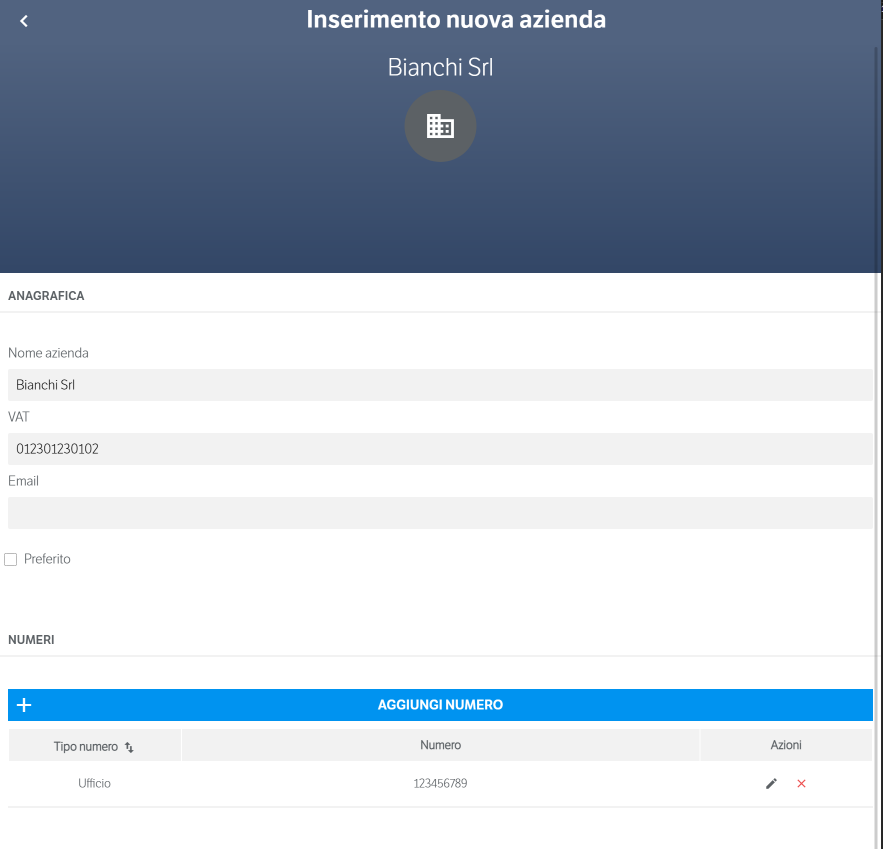
- REGISTRY: here you can enter the company name, VAT number and an e-mail;
- Favorite: a company with this flag will be displayed in the special Favorites panel when entering the Address Book.
- NUMBERS: in this section it is possible to add a number. For each new number, you can choose a type using the appropriate dialog box that opens by selecting the item
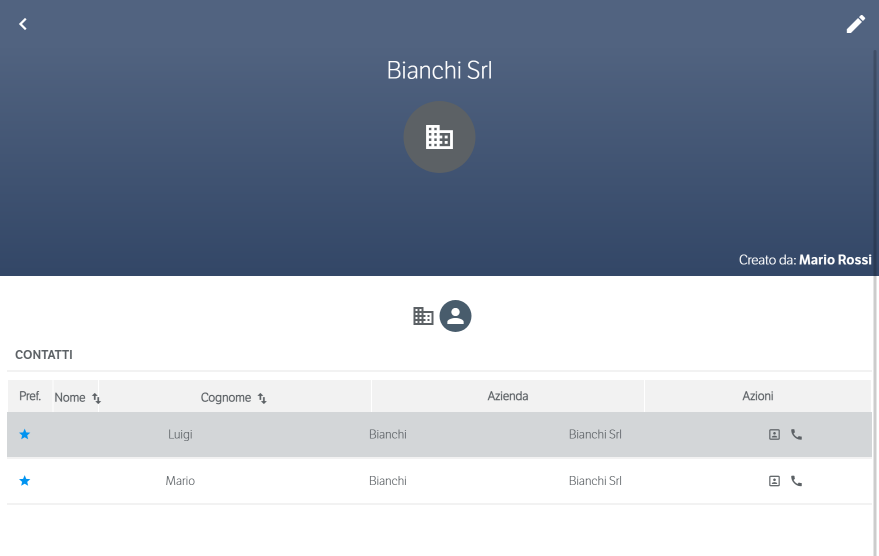
In addition, each company also allows you to view the list of contacts for which you have visibility. By selecting the “” button relating to a company, the details of its personal data will open; in this section by selecting the “” icon it will be possible to view the list of all contacts connected to that company for which you have visibility.